Day 28 Task: Jenkins Agents

Index
Understanding Jenkins Master and Agent
Jenkins Master (Server)
Jenkins Agent
Scaling Jenkins with Master-Agent Connection
Pre-requisites
Setting up Ubuntu 22.04
Installing Java and Docker
Ensuring Separate Rights and Permissions for Jenkins Users
Task-01: Creating a Jenkins Agent
Setting up a new AWS EC2 Instance
Establishing SSH and Key Pair Exchange
Verifying Agent Status under "Nodes" Section
Task-02: Running Previous Jobs on the New Agent
Utilizing Labels for Agent Identification
Triggering Builds from the Master Server
─── ⋆⋅☆⋅⋆ ───── ⋆⋅☆⋅⋆ ───── ⋆⋅☆⋅⋆ ───── ⋆⋅☆⋅⋆ ───── ⋆⋅☆⋅⋆ ──
▄︻テ══━一💥Introduction▄︻テ══━一💥
In the realm of CI/CD automation, Jenkins is pivotal, orchestrating workflows through its Master-Agent architecture. The Master, acting as a control server, directs tasks, while Agents execute them. Today, we embark on setting up a Jenkins Agent on Ubuntu 22.04, ensuring compatibility with the Master. Furthermore, we'll explore running previous jobs on this new Agent, optimizing task allocation with labels. Let's dive in to unlock the full potential of Jenkins in our CI/CD pipelines.
─── ⋆⋅☆⋅⋆ ──Jenkins Master and Agent─── ⋆⋅☆⋅⋆ ──
Jenkins Master (Server):
In the realm of Continuous Integration and Continuous Delivery (CI/CD), Jenkins reigns as a cornerstone, facilitating automated workflows with its Master-Agent architecture. The Jenkins Master, often likened to a control tower, serves as the nerve center of our CI/CD pipeline. Here, all key configurations are housed, and crucial decisions regarding workflow orchestration are made. From scheduling jobs to monitoring their execution, the Jenkins Master oversees every aspect of the CI/CD process, ensuring smooth and efficient operation.
Jenkins Agent:
Complementing the Jenkins Master is the Jenkins Agent, an essential component responsible for executing tasks delegated by the Master. Typically, an Agent is deployed on a separate machine or container, providing scalability and flexibility to our CI/CD infrastructure. When a job is triggered from the Master, it's the Agent that springs into action, executing the steps outlined in the job configuration. Each Agent is uniquely labeled, allowing the Master to assign tasks to specific Agents based on their capabilities and availability.
Scaling Jenkins with Master-Agent Connection:
As our CI/CD needs evolve, scalability becomes paramount. Jenkins offers a robust solution to scale our infrastructure through the Master-Agent connection. Instead of burdening a single system with all tasks, we can distribute workload across multiple Agents, allowing for parallel execution and faster build times. This approach not only improves efficiency but also enhances resilience, as tasks can be seamlessly shifted between Agents based on workload fluctuations or system failures.
Hand-On:
Setting up Jenkins Master:
Install Jenkins on a dedicated server.
Configure essential settings and plugins to tailor Jenkins to your requirements.
Set up security measures to protect sensitive data and ensure access control.

Configuring Jenkins Agent:
Install Java and Docker on the machine designated as the Agent.
Establish SSH communication between the Master and Agent for secure interaction.
Configure the Agent in Jenkins, specifying labels and connection details.
  sudo apt install openjdk-11-jre

  #or if java has been already installed we can verify by executing

  java --version
Scaling Jenkins Infrastructure:
Add additional Agents to Jenkins to handle increased workload.
Utilize labels and node properties to distribute tasks efficiently.
Monitor system performance and adjust Agent configurations as needed to optimize resource utilization.


─── ⋆⋅☆⋅⋆ ──Pre-requisites─── ⋆⋅☆⋅⋆ ──
Setting up Ubuntu 22.04: Install Ubuntu 22.04 operating system on your system or server where Jenkins will be installed. This provides the foundation for running Jenkins.
Installing Java and Docker: Install Java, ensuring it's the same version as required by Jenkins Master server. Additionally, install Docker to enable containerization, which is often utilized in Jenkins environments for running builds and tests.
Ensuring Separate Rights and Permissions for Jenkins Users: Set up user rights and permissions on the Ubuntu system to ensure that Jenkins users have restricted access based on their roles. This helps in maintaining security and control over Jenkins resources, preventing unauthorized access and ensuring proper resource utilization.
─── ⋆⋅☆⋅⋆ ──Task-01: Creating a Jenkins Agent─── ⋆⋅☆⋅⋆ ──
Setting up a new AWS EC2 Instance: Create a new EC2 instance on AWS, ensuring compatibility with Jenkins tasks. Configure security groups to allow SSH access.
Establishing SSH and Key Pair Exchange: Connect to the EC2 instance via SSH from the Jenkins Master. Exchange SSH keys for secure communication between the Master and Agent.
Verifying Agent Status under "Nodes" Section: Check the Jenkins dashboard's "Nodes" section to confirm the new Agent's online status for task execution. Troubleshoot any connectivity issues if necessary.
Steps to Configure the Jenkins in EC2 – AWS:
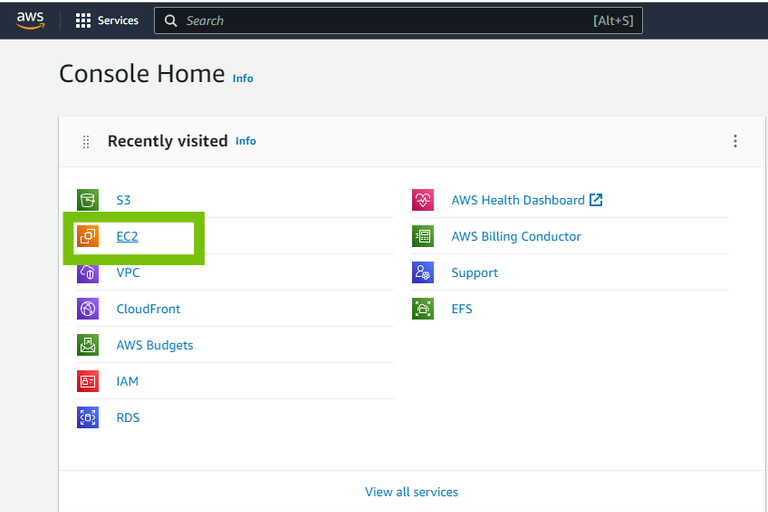
Step 1: Open the AWS console. Click on the EC2 Service.
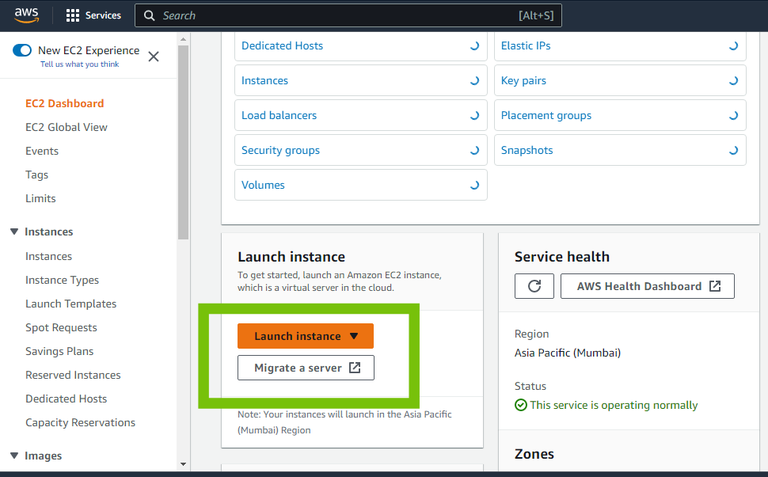
Step 2: Click on the Launch Instance button
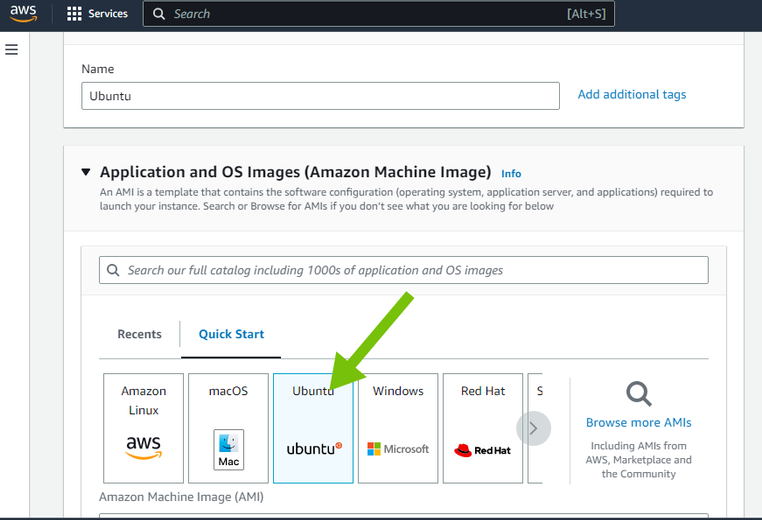
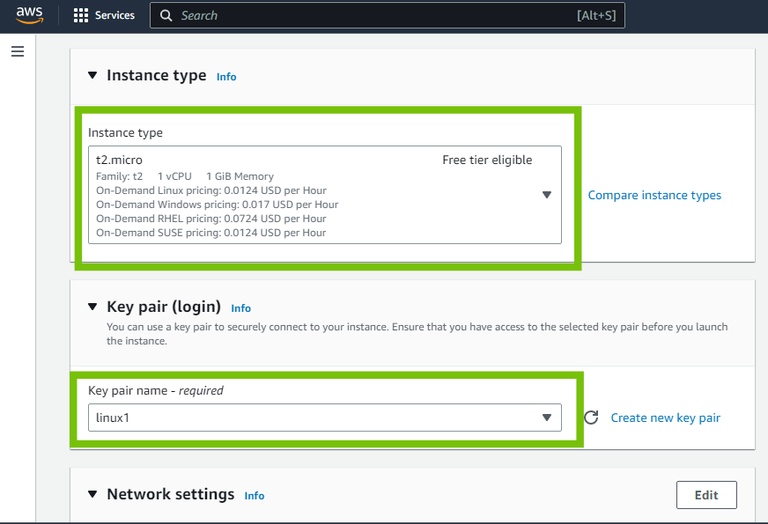
Step 3: Type the Instance name – Ubuntu. Select the AMI – Ubuntu
Step 4: Select the Instance type – t2.micro.Create or choose the existing Key pair – linux1
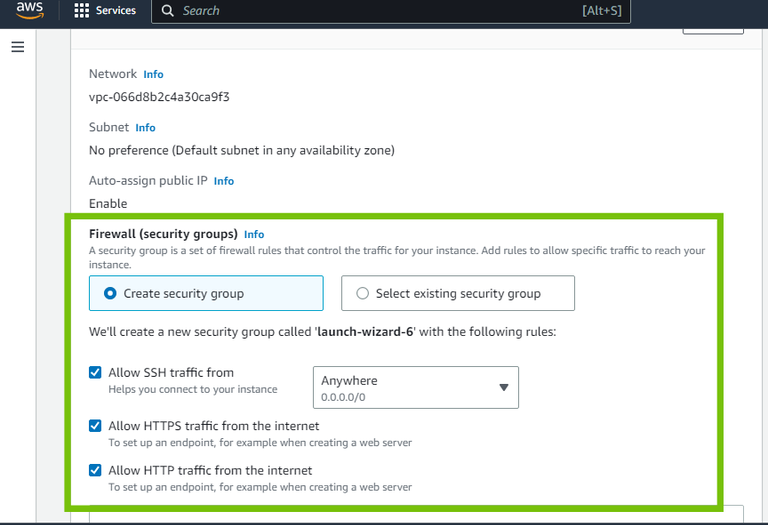
Step 5: Create the security group or choose the existing security group. Open the Port.
8080 – Jenkins
80 – HTTP
43 – HTTP
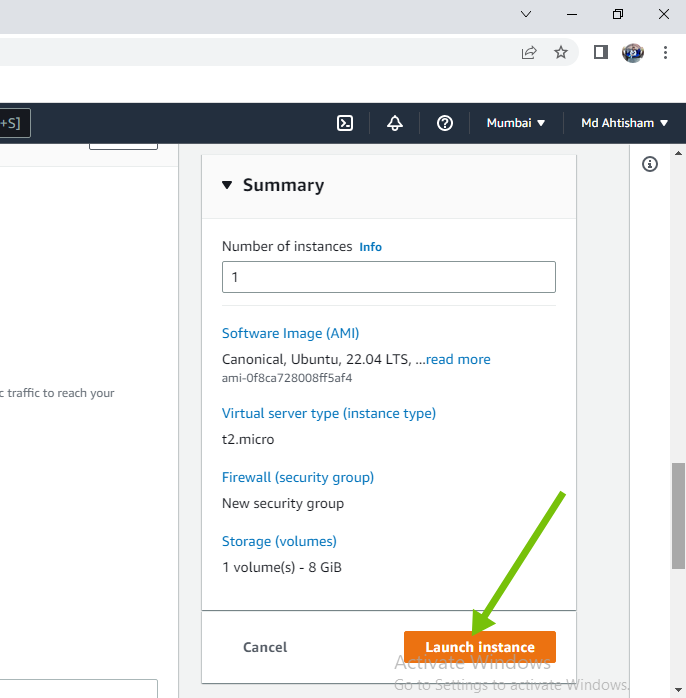
Step 6: Click on the Launch Instance Button
Step 7: Type the command for Root access
sudo su
Step 8: Update the Instance
apt-get update -y

Step 9: Install the JDK
apt install openjdk-11-jre
Step 10: Check the version
java -version

Step 11: Download plugins
curl -fsSL https://pkg.jenkins.io/debian/jenkins.io.key | sudo tee \ /usr/share/keyrings/jenkins-keyring.asc > /dev/null

Step 12: Install the plugins
echo deb [signed-by=/usr/share/keyrings/jenkins-keyring.asc] \ https://pkg.jenkins.io/debian binary/ | sudo tee \ /etc/apt/sources.list.d/jenkins.list > /dev/null

Step 13: Update the Instance again
apt-get update -y

Step 14: Install the Jenkins Tool
sudo apt install jenkins -y

Step 15: Check the Jenkins status
sudo systemctl status Jenkins

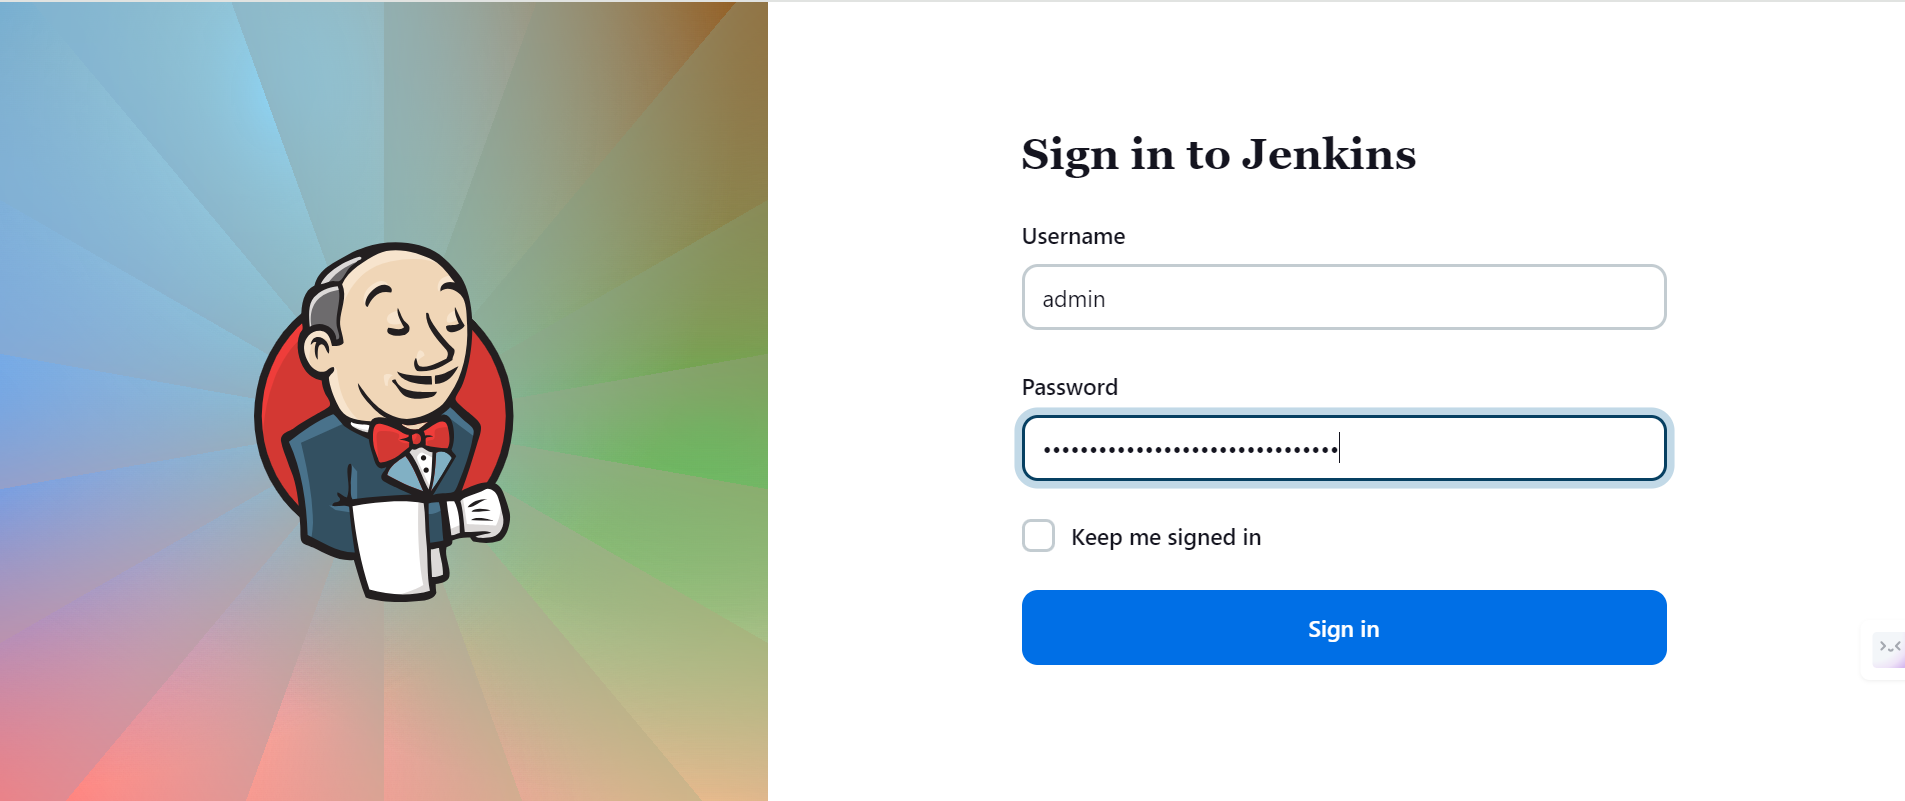
Step 16: Open the Browser and type the “HTTP//<instance-ip>:8080”.Copy the text from your screen “/var/lib/jenkins/secrets/initialAdminPassword”.

Step 17: Paste into the cmd shell after that you will get the code

Step 18: Then open the browser again and paste it into the Jenkins “Administrator password”

Step 19: Click on the Install suggested plugins

Step 20: Now Jenkins is ready you can use it as per your use. Click on the New item to create the job

─── ⋆⋅☆⋅⋆ ──Task-02: Running Previous Jobs on the New Agent───
Utilizing Labels for Agent Identification: Assign labels to the new Agent in Jenkins to identify its capabilities.
Triggering Builds from the Master Server: From the Jenkins dashboard, start job execution, specifying the label for the new Agent. Jenkins selects the Agent based on the label, ensuring the job runs on the designated Agent.
─── ⋆⋅☆⋅⋆ ──Conclusion─── ⋆⋅☆⋅⋆ ──
In conclusion, setting up a Jenkins Agent allows for distributed task execution, improving efficiency and scalability in CI/CD pipelines. By utilizing labels for Agent identification and triggering builds from the Master Server, tasks can be delegated to specific Agents based on their capabilities, optimizing resource utilization. This approach enhances the overall performance and reliability of Jenkins infrastructure, empowering teams to deliver software faster and more reliably.


